
Kling 3 Motion Control Troubleshooting Guide
Fix Kling 3 Motion Control input rejections, weak tracking, blur, framing drift, and prompt conflicts with a controlled one-variable retry workflow.
When Kling 3 Motion Control is not working, do not begin by rewriting a longer prompt. Validate the character image and motion video first, reduce the clip to one visible continuous action, run a neutral baseline, and change exactly one variable on each retry. That sequence separates an input problem from a motion problem, a prompt conflict, or a provider-side rejection. Start from the China Video AI homepage if you need to review the available workflows, then open the Kling 3 Motion workspace with the correct video-to-video model already selected. If your task has no driving clip, compare the separate image-to-video workspace instead.
This guide is for diagnosis, not magic wording. It will not promise that a clean file bypasses moderation or that one prompt guarantees a perfect transfer. It gives you a repeatable way to locate the weak stage before you spend another generation. For adjacent workflows, compare the MiniMax H3 reference-to-video guide, the lower-cost Seedance 2 Mini checklist, and the shot-planning approach in the AI product ad from one image guide.
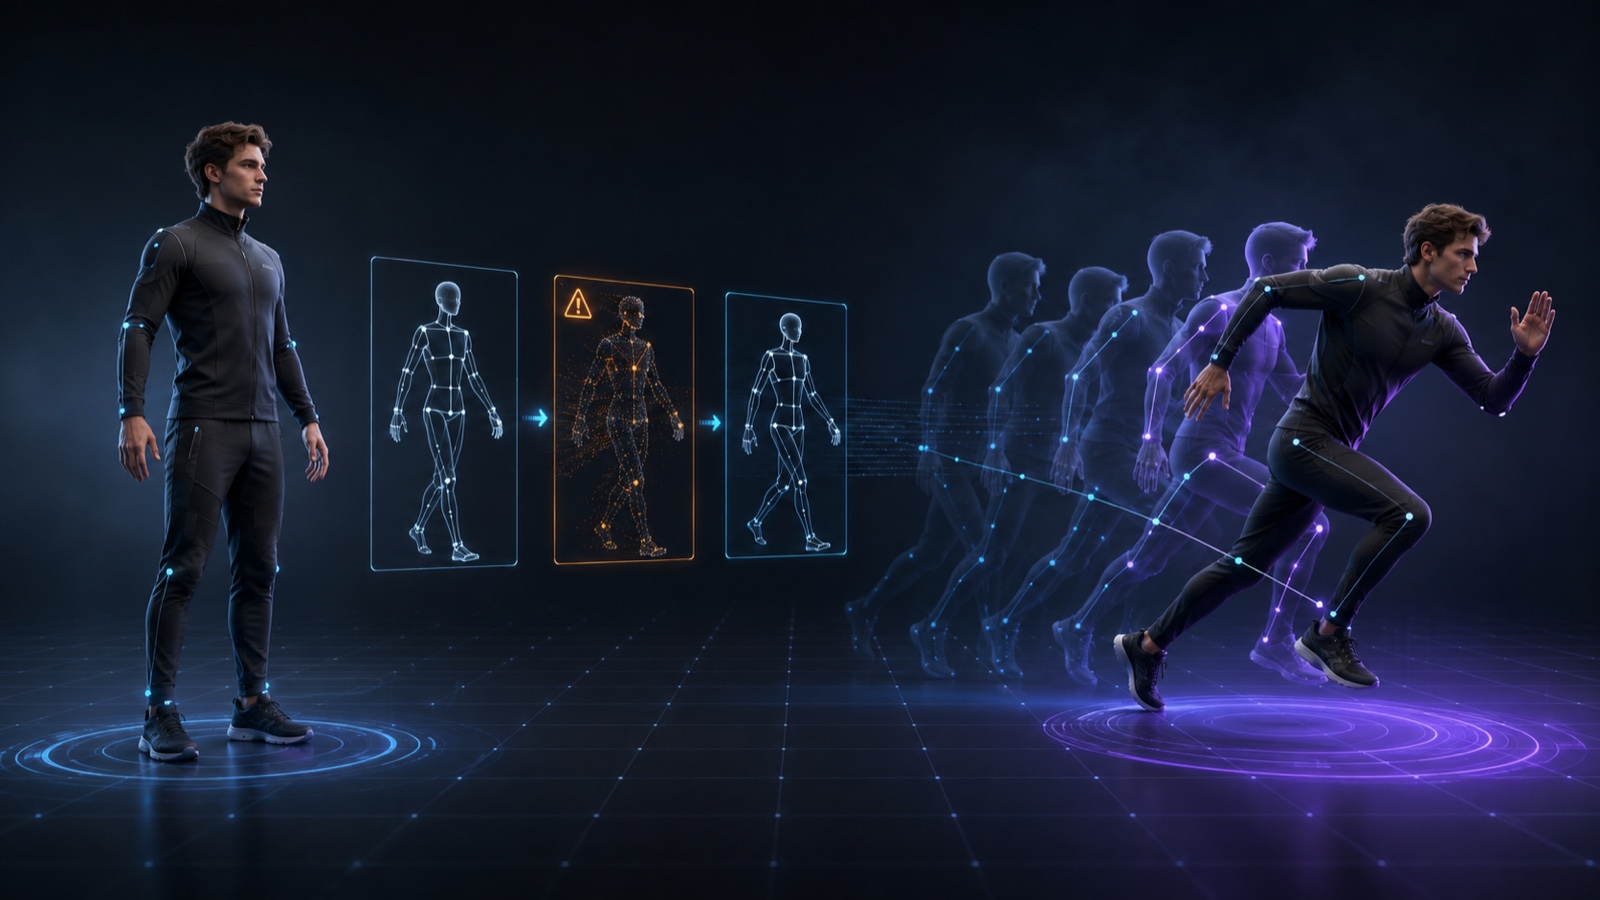
The short answer: debug the package before the prompt
Kling 3 Motion Control receives two visual sources with different jobs. The character image defines who or what should appear. The motion reference video defines how that subject should move. A prompt can describe scene, clothing, lighting, and camera intent, but it does not repair an invisible knee, a cut in the driving clip, a second person entering frame, or a subject that changes scale every second.
That is why random prompt iteration wastes time. If you change the image, motion clip, prompt, orientation, and output mode at once, a successful result teaches you nothing. A failed result teaches you even less. Use a controlled ladder instead:
Retry 0: original image + original video + neutral prompt
Retry 1: cleaner character image only
Retry 2: shorter motion clip only
Retry 3: matched body framing only
Retry 4: one scene or wardrobe instruction only
Keep the last known-good package at every step. Motion control becomes manageable when you treat it like a source-validation problem rather than a slot machine.
1. Confirm you are using the actual Motion Control route
On China Video AI, Kling 3 Motion is a specific model entry: kling-3-motion. It is available in video-to-video mode, not the normal text-to-video or image-to-video list. The current runtime maps it to the provider model kling-3.0/motion-control, uses 720p as the default diagnostic resolution, and accepts prompts up to 2,500 characters.
Open the video-to-video workspace with Kling 3 Motion selected. If the page opens a different mode or model, stop there. A prompt written for motion transfer will not make sense in a standard video generator that expects to invent movement from text.
Do not confuse model selection with an output-quality promise. A correct route proves that the request is being assembled for the intended workflow. It does not prove the input will pass provider checks or that every limb will remain stable.
2. Run the file-contract preflight
Current Kling and provider documentation describe a character image plus one motion video. The image is expected to be JPEG or PNG and the motion source MP4 or QuickTime. The provider contract calls for dimensions above 340 pixels, a character image no larger than 10 MB, and a motion video between 3 and 30 seconds. The current provider documentation also specifies a bounded aspect-ratio range rather than accepting arbitrary extreme panoramas.
Treat those values as a preflight, not creative advice. A beautiful image can still be a bad machine input. A video that plays locally can still be difficult to decode, outside the accepted duration, too small, or fetched through a URL the provider cannot reach.
Use this card before every retry:
CHARACTER IMAGE
- JPEG or PNG
- clearly visible head, shoulders, and torso
- full body visible when the motion needs legs or feet
- shortest useful dimension above 340 px
- no extreme crop or panoramic aspect ratio
- one dominant subject

MOTION VIDEO
- MP4 or QuickTime
- 3–30 seconds under the current provider contract
- one continuous shot
- one dominant performer
- stable enough to inspect frame by frame
- no surprise cut, overlay, or second person entering frame
If a URL-based upload is involved, check that the source returns a real media MIME type and is accessible without an expiring browser session. A dashboard thumbnail or signed link that expires quickly is not a durable source file.
3. Match body framing before you judge motion quality
The most useful official recommendation is also the easiest to overlook: match the body scale in the character image to the performer scale in the motion reference. Pair full-body with full-body. Pair half-body with half-body. If the video contains footwork but the still ends at the waist, the transfer must invent legs that have no visual definition in the identity source. If the still is a close-up while the motion source is a distant figure, the model must reconcile incompatible subject scales.
Framing mismatch often looks like a motion failure even though the choreography is readable. Typical symptoms include hands changing size, feet slipping, clothing stretching, a torso that turns while the face remains locked, or a sudden crop when the performer reaches the edge of frame.
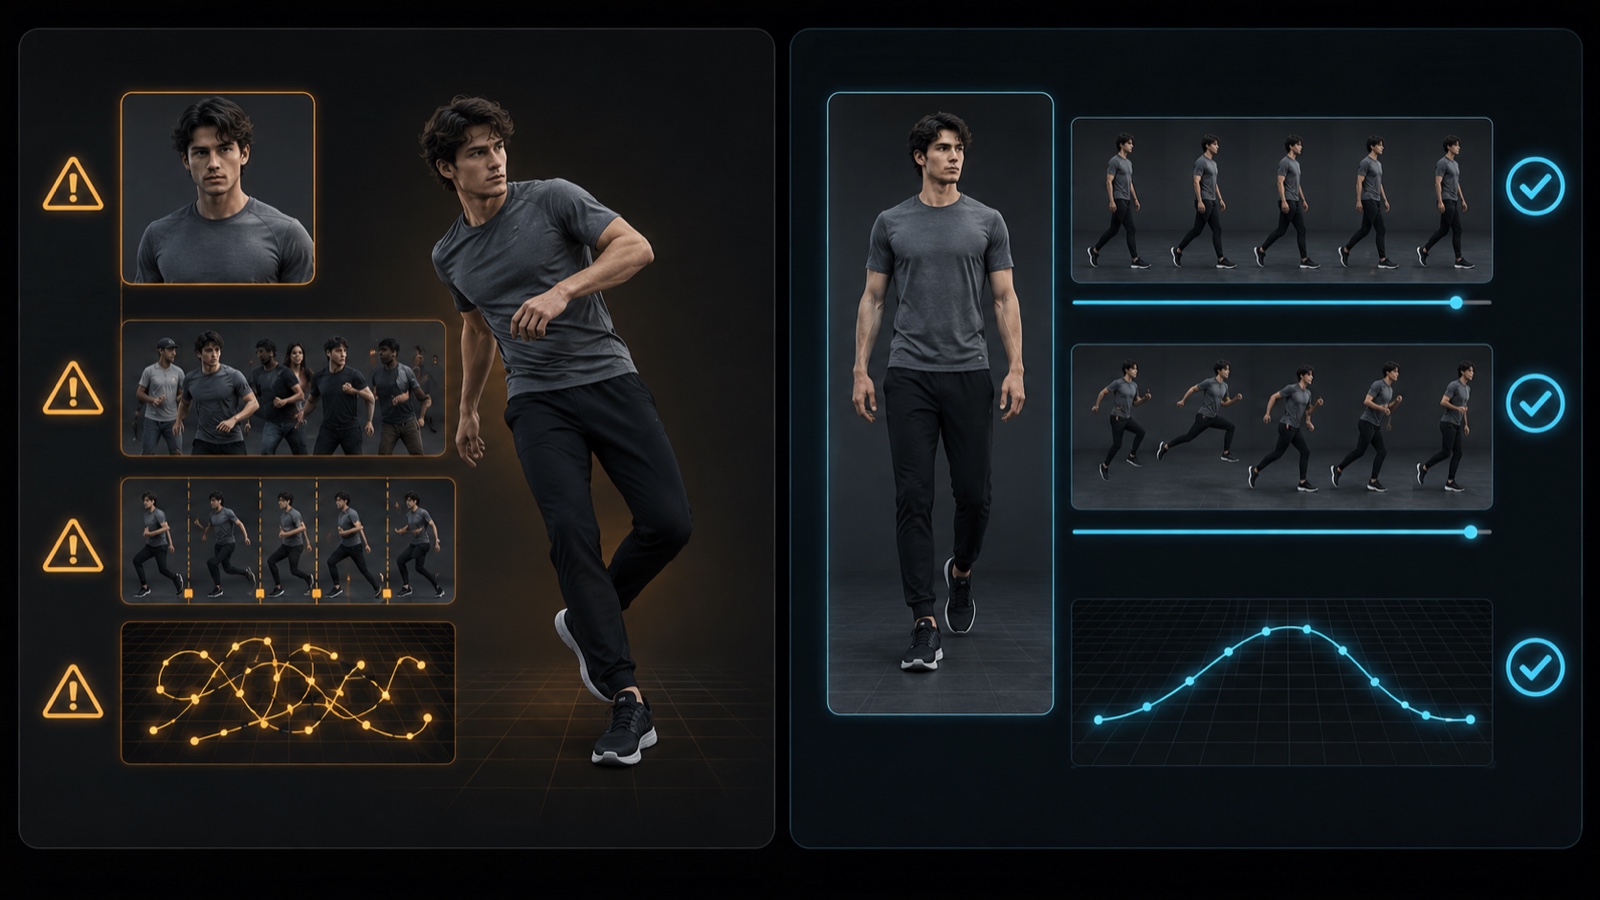
Make a diagnostic pair rather than guessing:
Image A: neutral full-body pose, hands and feet visible, simple background
Video A: full-body performer, one action, stable camera, moderate speed

Image B: clean half-body portrait, arms visible, simple background
Video B: half-body gesture, no turning away, stable camera, moderate speed
Run A with A or B with B. Do not cross them during diagnosis. Once a matched pair works, you can test how far the model tolerates framing differences.
4. Simplify the motion video into one readable action
Motion-control input is not an edit reel. Cuts, angle changes, speed ramps, occlusion, whip pans, and multiple people create discontinuities in the very signal the model is supposed to follow. Official guidance recommends a single continuous shot, a consistently visible character, moderate movement, and minimal camera motion. Complex or fast action may also produce a shorter usable result because only a continuous segment can be extracted.
Start with the smallest clip that contains one complete action: one turn, one two-step dance phrase, one hand gesture, one sit-to-stand movement, or one product presentation beat. Keep a short neutral lead-in and tail so the first and last useful poses are not clipped, but remove unrelated waiting time.
Use a motion-complexity ladder:
Level 1: one gesture, fixed feet, fixed camera
Level 2: one weight shift or step, fixed camera
Level 3: two connected movements, fixed camera
Level 4: moderate travel across frame
Level 5: camera movement or large turn
Level 6: fast action, occlusion, or multiple beats
If Level 2 fails, adding Level 5 will not clarify the cause. Go down one level, restore visibility, and retest. A slower diagnostic clip is not your final creative limit; it is the control sample that proves the pipeline can see the performer.
5. Use a neutral baseline prompt
The motion video already describes choreography. Repeating every arm swing and footstep in prose can create a second, conflicting motion plan. During diagnosis, the prompt should stabilize identity and the environment while leaving the action to the reference video.
Start here:
Preserve the character's face, hairstyle, body proportions, clothing, and colors.
Follow the motion reference for timing and body movement.
Keep one continuous shot with stable framing and a simple studio background.
Natural anatomy, coherent hands, consistent lighting, no extra people.
This prompt does not guarantee a result. It is useful because it removes decorative choices. If the baseline works, add one creative instruction at a time. If it fails, the most likely next test is a cleaner source pair, not a paragraph of negative prompts.
6. Separate identity, scene, camera, and movement instructions
When you are ready to expand the baseline, give each sentence one job. This makes the next failure legible. A dense cinematic paragraph can hide three contradictions: the motion video moves left while the prompt says right, the character image wears a coat while the prompt replaces it with loose fabric, and the camera reference stays fixed while the prompt demands an orbit.
Use a four-line contract:
IDENTITY: Keep the same face, hair, silhouette, jacket, and shoe colors.
SCENE: Place the character in a clean rehearsal room with soft side light.
CAMERA: Use a locked waist-height camera; do not zoom or orbit.
MOTION: Follow the reference clip's timing and body movement.
If wardrobe drifts, strengthen only the identity line. If the background boils, simplify only the scene line. If a dolly becomes a digital zoom, remove camera movement and prove a locked shot first. Motion-control debugging is faster when the prompt reads like a checklist instead of a trailer voice-over.
7. Diagnose “unsupported content” without guessing at moderation
An “unsupported content” message is not a transparent diagnosis. It can be tempting to infer a single banned word or assume the provider is broken. Current community reports show that people sometimes receive rejections with apparently ordinary images and short prompts, but those reports do not reveal the provider's internal classifier or establish a universal cause.
Use a bounded isolation sequence:
- Keep the same image and replace the motion video with a plain, self-recorded single-person walk or gesture you have rights to use.
- Keep the clean motion video and replace the character image with a neutral, unobstructed, fully clothed subject image you own.
- Keep both clean files and replace the prompt with the neutral baseline above.
- Remove embedded text, logos, borders, collages, overlays, watermarks, and screen-recorded interface chrome from the inputs.
- Re-export the files into ordinary JPEG and MP4 containers, then retry once.
Stop if the provider continues to reject a clearly compliant package. Do not try to evade safety systems, rotate accounts, or disguise content. Record which stage failed and return later. The purpose of the sequence is to find an accidental input issue, not to reverse-engineer moderation.
8. Repair blur, morphing, and sliding feet
Fast action combines several hard problems: pose change, self-occlusion, motion blur, contact with the ground, and often camera travel. Community reports about blurry or artificial action are useful as symptoms, but they are not controlled benchmarks. Your repair should therefore test one physical source property at a time.
First, remove camera movement. Second, reduce the action to a single beat. Third, choose a frame where hands, elbows, knees, and feet remain visible. Fourth, reduce background detail so the subject is easy to segment. Fifth, match the clothing silhouette in the still to the motion reference; a long coat, skirt, or loose sleeve creates extra moving surfaces that may obscure limbs.
Use this repair prompt after the neutral baseline succeeds:
Keep the character centered and fully visible from head to toe.
Preserve face, clothing silhouette, and limb proportions through the action.
Follow one moderate step and stop; maintain firm foot contact with the floor.
Locked camera, even lighting, simple background, no added objects.
If the first half is stable and the second half breaks, trim the reference just before the first drift frame and test the remaining clean segment separately. That tells you whether duration and accumulated occlusion are part of the problem.
9. Distinguish camera failure from subject-motion failure
A digital zoom and a physical camera move are not the same. A dolly or tracking move should create parallax: foreground and background objects shift relative to each other as the camera changes position. A zoom changes framing without the same spatial translation. If the output enlarges the subject but the room geometry stays flat, the failure belongs to the camera branch, not the body-motion branch.
Prove the subject transfer with a locked camera first. Then test one camera instruction with a scene that contains visible depth cues: a foreground object, the subject, and a background wall. Avoid combining orbit, crane, dolly, and handheld movement in one diagnostic clip.
Camera test: the camera tracks forward slowly on a physical dolly.
Keep the subject's walking pace unchanged.
Maintain visible parallax between the foreground chair and rear wall.
No digital zoom, no focal-length change, no orbit.
Even clear wording may not force the desired geometry every time. The useful result of the test is knowing whether subject motion remains stable when camera intent is introduced. If identity breaks only after camera movement appears, you have isolated the expensive variable.
10. Choose orientation as a composition decision
Motion-control systems commonly separate an orientation that follows the driving video from one that holds closer to the character image. Official guidance notes that these choices affect what follows the motion reference and can also affect the supported duration and camera behavior. Treat orientation as part of shot design, not a hidden quality toggle.
Use video-following orientation when turns and facing direction are essential to the performance. Use image-following orientation when the uploaded character's facing direction must remain the stronger anchor and the movement can be adapted around it. If you switch orientation and prompt at the same time, you will not know which change fixed or broke the result.
For diagnosis, write the selected orientation into your test log. Keep the same source pair and neutral prompt, then compare the two modes on the shortest accepted clip. Do not generalize one result to every pose, costume, or camera setup.
11. Review the whole clip, not the prettiest frame
A motion transfer can produce an excellent thumbnail and still fail as video. Scrub from beginning to end. Watch the face during turns, hands during overlap, feet at contact, clothing during large pose changes, and background edges when the subject crosses them. Mark the first frame where drift becomes visible.
The playable clip below is an owned China Video AI review sample. It is included to demonstrate whole-clip inspection of identity, motion, timing, and framing; it is not presented as a Kling 3 Motion Control output.
Score the output on six separate axes:
- Identity: face, hair, body proportions, and clothing remain recognizable.
- Anatomy: hands, elbows, knees, and feet do not merge or multiply.
- Timing: the action follows the useful reference segment without unexplained pauses.
- Contact: feet, hands, props, and surfaces keep believable contact.
- Camera: movement matches the intended physical camera behavior.
- Background: edges and depth cues remain stable as the subject moves.
Do not average a severe anatomy failure into a pretty lighting score. Decide which axis blocks use, then modify the source most directly connected to that axis.
12. Use a one-variable retry log
The simplest production improvement is a written retry log. Give every run an ID and record the exact image, video segment, orientation, prompt version, and first drift frame. “Tried again” is not a reproducible note.
K3MC-01 | Image A | Video A 00:02–00:06 | video orientation | neutral prompt
Result: accepted; face stable; left foot slides at 00:03.4

K3MC-02 | Image A | Video A 00:02–00:05 | video orientation | neutral prompt
Change: trimmed before the cross-step
Result: foot contact improved; use as current control
Once you have a control, branch deliberately. One branch can test wardrobe detail, another camera travel, another a longer action. If a branch fails, return to the control rather than rebuilding the package from memory.
For broader model selection, use the Chinese AI video models guide. If your task needs a still-led workflow rather than a driving video, open the Seedance 2 Mini image-to-video generator instead of forcing Motion Control to solve the wrong problem.
13. A practical stop rule
Stop retrying when the same clean package fails repeatedly without a new variable to test, when the provider rejects an input you cannot safely simplify, when you do not own the motion footage, or when the shot needs several people and cuts that violate your diagnostic control. More retries do not create evidence by themselves.
You may also discover that the shot is better split into two clips. A three-second controlled action followed by a separate camera move is easier to review than one complex take that mixes choreography, identity changes, and scene transitions. Edit the verified pieces together later.
The goal is not to prove that Kling 3 Motion Control can handle every source. The goal is to decide, with the fewest ambiguous retries, whether this source pair can become a stable shot.
FAQ
Why does Kling 3 Motion Control reject an ordinary image or video?
A rejection does not disclose one universal cause. Check format, duration, dimensions, aspect ratio, subject visibility, single-person framing, and prompt wording. Then isolate the image, motion clip, and prompt one at a time. Do not infer moderation logic from one error message.
What makes a good Kling Motion Control reference video?
Use one continuous shot with one visible person, moderate movement, minimal occlusion, stable framing, and room around the body. Match the body crop to the character image and keep cuts or camera moves out of the first diagnostic test.
How long should the motion reference be?
The current provider contract accepts 3 to 30 seconds, while orientation can narrow the usable ceiling. Start with a 3-to-5-second control clip because it is easier to inspect and retry, then extend only after the source pair works.
Why is the output blurry during fast movement?
Fast motion combines pose change, occlusion, blur, contact, and sometimes camera travel. Slow the action, stabilize the camera, simplify the background, keep limbs visible, and restore complexity one step at a time.
Should the prompt describe every movement?
No. Let the motion video carry choreography. Use the prompt to hold identity, wardrobe, scene, lighting, and camera intent. If the prose contradicts the reference, shorten it to the neutral baseline.
Where should I run the next controlled test?
Return to the China Video AI homepage if you need to compare workflows, open the Kling 3 Motion workspace with the model preselected, or use the separate image-to-video workspace only when your test has no driving clip. Upload one owned character image and one owned motion clip, run the neutral baseline, and write down the single variable you change next.