
How to Make an AI Product Ad From One Image
A practical, shot-by-shot workflow for turning one product photo into a short AI video ad with stable identity, controlled motion, and a reviewable final cut.
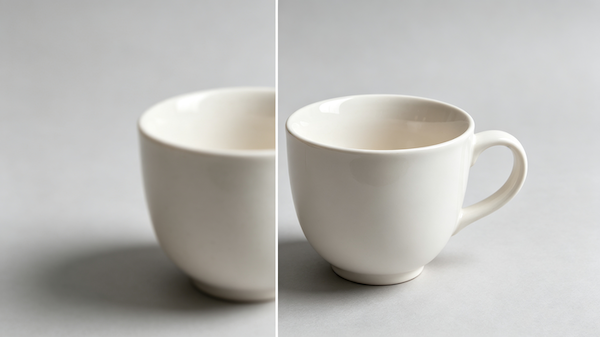
If you have one good product photo, you already have enough to test a useful AI commercial. The mistake is treating the task like a single prompt contest. A product ad is a sequence: the product has to stay recognizable, every shot needs a reason to exist, and the final cut has to survive a human review for claims and brand details.
Start with the China Video AI homepage if you are still collecting references. When you are ready to generate, open the image-to-video workspace. The link preselects Seedance 2.5 so you can begin with a consistent baseline instead of changing the model before you understand the shot.
If you want a cheaper first-pass decision loop before building a full product sequence, read the related Seedance 2 Mini reference-to-video checklist. It shows how to test one small reference package before you commit to a larger workflow.
The short answer: one image, several controlled shots
The reliable pattern is simple: prepare one reference, lock the identity, write a shot list, generate short clips, and assemble only the clips that pass review. Each step removes a different source of failure.
The reference image answers “what is the product?” The shot list answers “what should the viewer notice?” The prompt answers “how does the camera move?” The final edit answers “does the sequence make sense?” Mixing all four questions into one paragraph makes it difficult to tell why a result failed.
For a first test, use three shots:
- A clean reveal that establishes the object.
- A controlled detail move that shows material or one approved feature.
- A closing hero shot that leaves room for your own copy.
This is enough to evaluate identity, movement, and editability without spending time on a full storyboard.
1. Prepare the only image that matters
The best reference is not necessarily the most dramatic photo. It is the one that gives the model an unambiguous silhouette. Use a three-quarter or front view, keep the whole product inside the frame, and avoid hands, heavy motion blur, transparent packaging, and reflections that look like extra objects.
Before uploading, make a small source checklist:
- Is the product fully visible from cap to base?
- Is the main color correct and evenly lit?
- Can a viewer identify the material without zooming?
- Are logos or label claims readable enough to review?
- Is the background simple enough that a new scene can be added later?
If the label contains important legal copy, do not ask a video model to redraw it. Use the generated footage for motion and add approved text in the edit. This keeps a model from inventing a discount, ingredient, or performance claim.
The reference image is a constraint, not just an input. Save the original, a cropped working copy, and a note describing what must remain unchanged. That note becomes the identity line in every shot prompt.
2. Lock product identity before you request motion
Product consistency improves when the prompt names the invariants directly. Use plain, observable nouns: “same matte black bottle,” “same short cylindrical cap,” and “same centered label area.” Avoid stacking synonyms such as “sleek, elegant, luxury, premium, minimalist, iconic.” Those words express taste, but they do not tell the model what to preserve.
A useful identity block looks like this:
Identity lock:
- keep the exact silhouette, cap, material, color, and proportions from the reference
- keep the label position and product scale consistent
- do not add a second object, new logo, or readable invented packaging text
Put this block at the top of every shot prompt. Change the action below it, not the identity description. If a shot fails, regenerate that shot with one smaller change instead of rewriting the whole prompt.
3. Turn the ad into a shot list
A shot list is the bridge between a still image and a commercial. Give each clip one subject, one movement, and one job in the edit. The following structure works for a six-to-twelve-second vertical or landscape cut:
| Shot | Viewer job | Camera | Product action | Keep out | | --- | --- | --- | --- | --- | | 1. Reveal | Recognize the product | slow push-in | product stays still | extra props | | 2. Detail | Notice one surface or feature | short orbit | light moves across the surface | label rewrite | | 3. Hero | Remember the product | gentle pull-back | product stays centered | busy background |
The table is intentionally boring. Boring is useful during the first pass because it gives you a baseline. Once the product survives these shots, add a hand, a pour, a rotation, or a more complex environment as a separate experiment.
For a detail shot, name the feature and its location. “Show the brushed metal cap in a close-up” is testable. “Make it feel luxurious” is not. For a hero shot, reserve empty space for copy instead of asking the model to render a slogan inside the scene.
4. Write prompts that separate facts from style
The strongest product-video prompts have five layers: identity, framing, movement, lighting, and exclusions. Keep the order stable so you can compare attempts.
Reference: use the uploaded product image as the single identity source.
Framing: medium shot, product centered with empty space on the left.
Movement: slow camera push-in over six seconds; product remains stable.
Lighting: soft key light from the upper left, subtle warm rim light.
Exclusions: no extra products, no new logo, no readable invented text, no warped cap.
Style should come after the physical instruction. “Editorial studio commercial” can guide the mood; it should not replace the camera direction. If you need a different look, change only the lighting or background line and keep the rest identical.
5. Choose the model after the brief is stable
Model comparisons are meaningful only when the input, shot brief, duration, and review criteria stay the same. Otherwise you are comparing different creative directions, not models.
For a first pass in the China Video AI workspace, use Seedance 2.5 from the preselected image-to-video workflow. If the motion is not right, fix the shot description before switching models. If you do compare models, run the exact same reveal shot and record four observations: product identity, camera smoothness, background stability, and useful frames per clip.
Use the Chinese AI video models guide to understand which model options are currently exposed in the product. Treat the guide as a map of available workflows, not a promise that one model wins every shot.
6. Generate short clips and keep a small experiment log
Short clips are easier to regenerate, and an experiment log prevents you from selecting a pretty but unusable take. Record the reference filename, model, prompt version, duration, and one sentence about the result.
Shot: 02-detail
Model: seedance-2-5
Reference: bottle-front-v3.png
Prompt version: detail-cap-v2
Result: material stable; cap bends during the last second; regenerate with slower orbit
Do not change three variables between attempts. If you change the model, camera, and background at the same time, you will not know which change helped. Keep the best take and the failed take for comparison; the failure often shows which constraint needs to be explicit.
7. Review identity before aesthetics
Use a two-pass review. The first pass is a hard product check, not a beauty contest:
- silhouette and proportions stay stable;
- cap, handle, nozzle, or other small parts do not melt;
- color and material do not shift without a reason;
- no duplicate product appears;
- no invented label, medical claim, price, or badge appears.
Only after a clip passes that list should you judge atmosphere, camera energy, and lighting. A beautiful shot that changes the product is a retouching problem, not a finished ad.
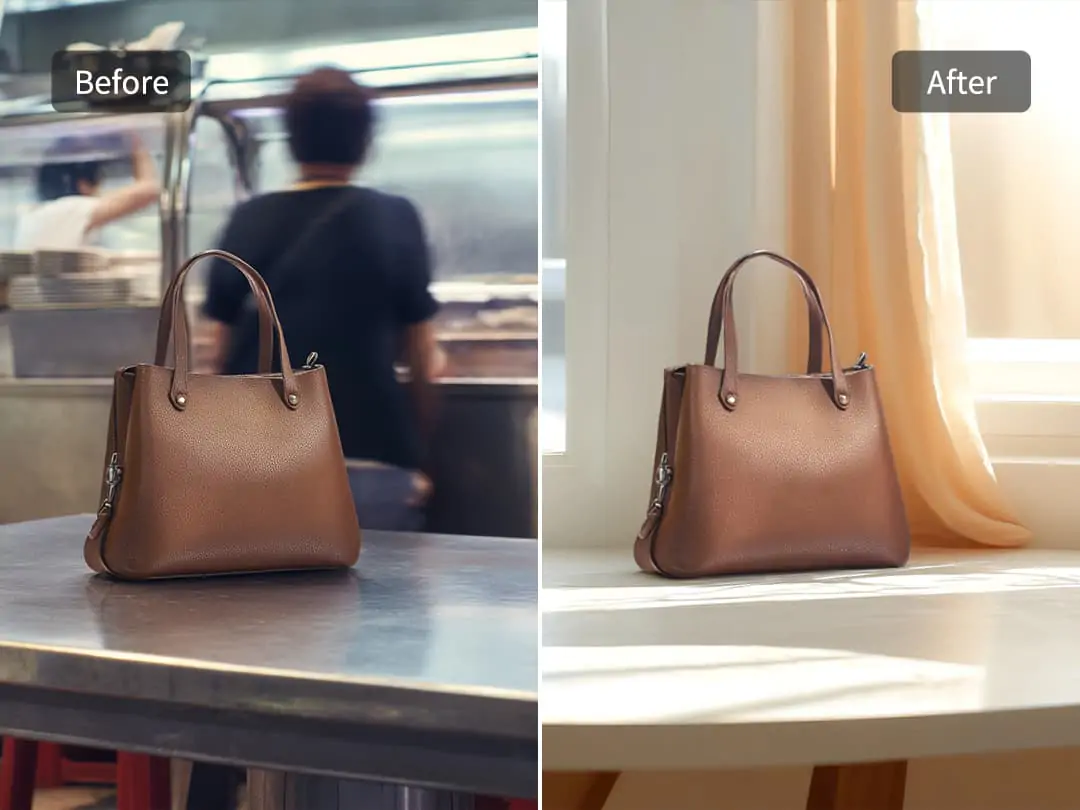
If identity drifts at the end of a clip, shorten the shot or reduce the movement before adding more negative prompt language. Motion gives the model more opportunities to reinterpret the reference. A six-second reveal that stays accurate is more useful than a ten-second move that ends on a different object.
8. Assemble the sequence around one message
An AI generator can make several attractive clips, but an advertisement still needs one message. Choose one product benefit that you can support, then make every shot point toward it. Do not let the first clip sell texture, the second sell speed, and the third sell a discount unless the product brief actually supports all three.
Reserve the final second for a clean end frame. Add the approved product name, URL, or call to action in the editing stage, where typography is controllable. If the generated scene already contains invented text, crop it out or regenerate before adding your own copy.
For a simple three-shot cut:
00:00–00:02  Reveal: establish the product and color.
00:02–00:05  Detail: show the approved material or feature.
00:05–00:08  Hero: hold the product and leave copy space.
The final cut should be judged on a phone-sized preview as well as a large monitor. Fine packaging details may be invisible on mobile, while a warped silhouette is obvious everywhere.
9. Use the right failure diagnosis
When a clip fails, name the failure before editing the prompt. “It feels wrong” is too broad. Use one of these diagnoses:
| Symptom | Likely cause | Smallest next change | | --- | --- | --- | | Product changes shape | identity is underspecified | repeat invariants and reduce motion | | Background overwhelms object | framing is vague | specify subject scale and empty space | | Label becomes gibberish | model is redrawing text | remove readable text from generation; add in edit | | Motion feels rubbery | movement is too complex | use one slower camera move | | Ending collapses | clip is too long for the action | shorten duration or hold a static hero frame |
This diagnosis funnel keeps iteration cheap. Fix the cause that is most visible to the viewer, not the detail that is most interesting to the person writing the prompt.
If the failure comes from transferring a person’s movement rather than preserving a product, switch to the Kling 3 Motion Control troubleshooting guide and use its image-plus-motion preflight.
Review order:
1. product identity
2. unwanted objects or claims
3. camera timing
4. lighting and background
5. edit rhythm and copy space
10. A reusable production checklist
Save this checklist with the project so a second person can review the work without reading your prompt history.
- Source image is owned or licensed for the intended use.
- Product silhouette, color, material, and label placement are recorded.
- Each shot has one camera move and one viewer job.
- The same reference and identity block are used for every shot.
- Model comparisons use the same brief and review criteria.
- Generated clips are reviewed frame by frame for drift and invented claims.
- Approved copy, logos, music, and disclosure language are added in the edit.
- Final cut is checked at the target aspect ratio and on a mobile preview.
You can also watch a short site-hosted example clip while reviewing motion and timing:
The clip is there to make the review criteria concrete: look at whether the subject stays coherent, whether the camera movement has a beginning and end, and whether the final frame gives the editor enough room to work. It is not a claim that every product or model will produce the same result.
Frequently asked questions
Can I make a product ad from only one image?
Yes. One clean reference image is enough for a short concept ad. The workflow becomes more reliable when the product identity is locked and each clip has one job.
Which model should I use first?
Start with Seedance 2.5 for a balanced baseline in the image-to-video workspace. Keep the reference, duration, and shot brief fixed before you compare another model.
How many shots should a first test contain?
Three shots are enough: reveal, detail, and hero. They expose most identity, motion, and editability problems without creating a large review burden.
Should I ask the model to render the slogan?
Usually no. Add approved typography in the edit so spelling, legal wording, and brand spacing remain under human control.
What if the product changes halfway through the clip?
Shorten the clip, reduce the camera movement, repeat the identity invariants, and regenerate only that shot. Switching the entire project to a new prompt usually hides the real cause.
Where can I test the workflow?
Open the China Video AI image-to-video workspace, upload one reference image, and generate the reveal shot first. You can return to the homepage when you need to change tools or review the Chinese AI video models guide.
The goal is not to make one lucky clip. It is to build a repeatable loop: one reference, one shot brief, one controlled change, and one human review. When that loop is stable, a product photo becomes a useful starting point for a real ad rather than a prompt lottery.
One practical habit makes this loop easier to scale: keep a “known good” reference and a “known good” prompt beside the project. The known-good pair is not a promise of a perfect output; it is a calibration point. When a new model version, aspect ratio, or duration behaves differently, run the calibration shot first. If the calibration fails, pause the campaign experiment and investigate the tool or input. If it passes, continue with the new creative direction. This small separation protects the team from confusing a platform change with a creative change.
It is also worth keeping the rejected clips. A rejected clip with a clear diagnosis is useful training material for the next editor: it shows what “label drift,” “duplicate object,” or “camera overshoot” looks like in practice. Store the reason, not just the file. Over time, these examples become a private quality library that is more useful than a collection of screenshots with no context.
Finally, write the review criteria before you generate. If the campaign objective is click-through, reserve enough space and time for the call to action. If the objective is product recognition, give the first shot a stable silhouette and avoid a fast reveal. If the objective is a feature explanation, use the detail shot to isolate one verifiable feature. The same model can look excellent or unusable depending on whether the shot is designed around the actual decision the viewer must make.
This is also why a small, honest first article is more valuable than a large gallery of disconnected prompts. A reader can copy the sequence, understand what to inspect, and return to the workspace with a clear next action. The site can then add supporting pages for prompt recipes and consistency diagnostics without changing the meaning of this cornerstone page.
Ready to test your first shot? Start at the China Video AI homepage or open the preselected Seedance 2.5 image-to-video workspace.
If the workflow now needs separate image, motion, and audio roles inside the Seedance family, continue with the Seedance 2.5 reference-to-video guide before you expand the commercial sequence.
If the next test needs separate identity, motion, and audio references, use the MiniMax H3 reference-to-video guide to design the smallest useful package first.
For a complete multi-shot campaign, continue with the AI video storyboard prompt guide and give every product shot a distinct editing job.